 English
Controlled pollination is what separates a deliberate cross from an accident. The technique itself is simple, yet the margin for error is small. One careless afternoon can seed an entire flowering room.
This guide covers timing on both sides, the three practical methods, and how to take the seed through to storage.
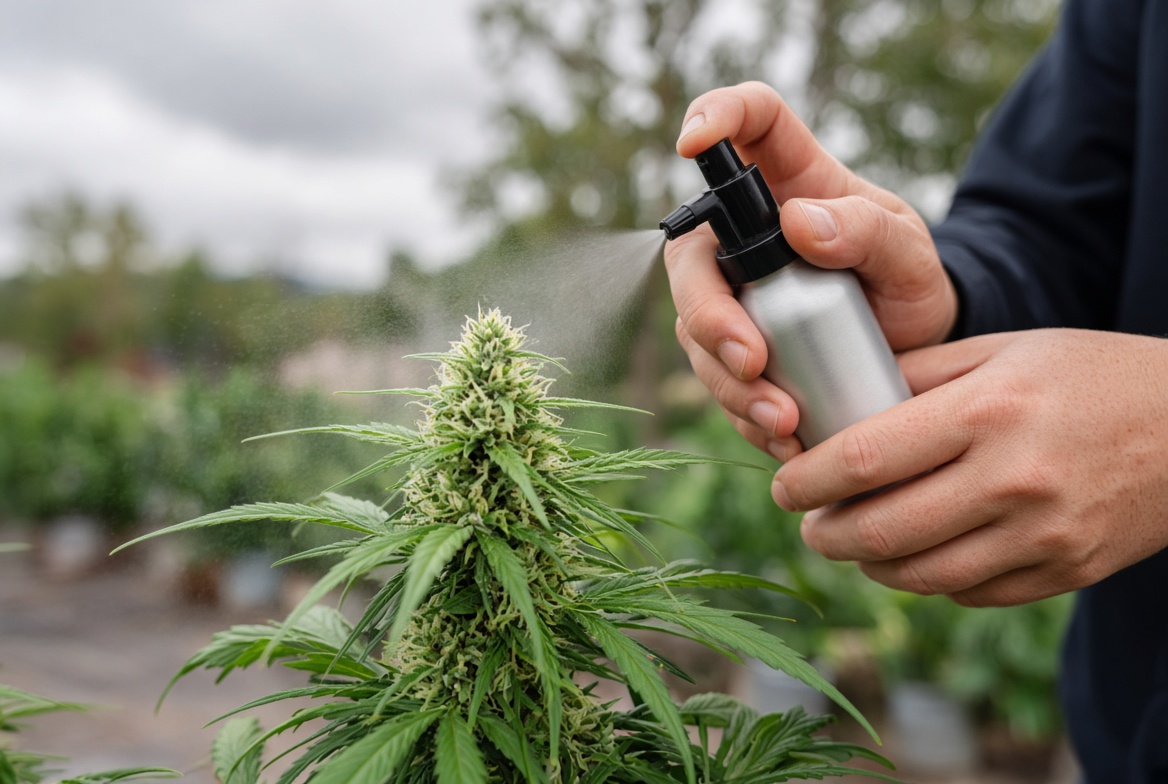
Why control matters
Uncontrolled pollen produces seed you cannot trace. You will not know which male fathered which seed. Consequently the whole selection effort is wasted. Control is therefore about record keeping as much as about plants.
What happens without it
A single open male in a shared room seeds everything. Flowers fill with seed and the harvest loses most of its value. Pollen also survives on surfaces for weeks. Cleaning up afterwards is far harder than preventing it.
Timing on the female side
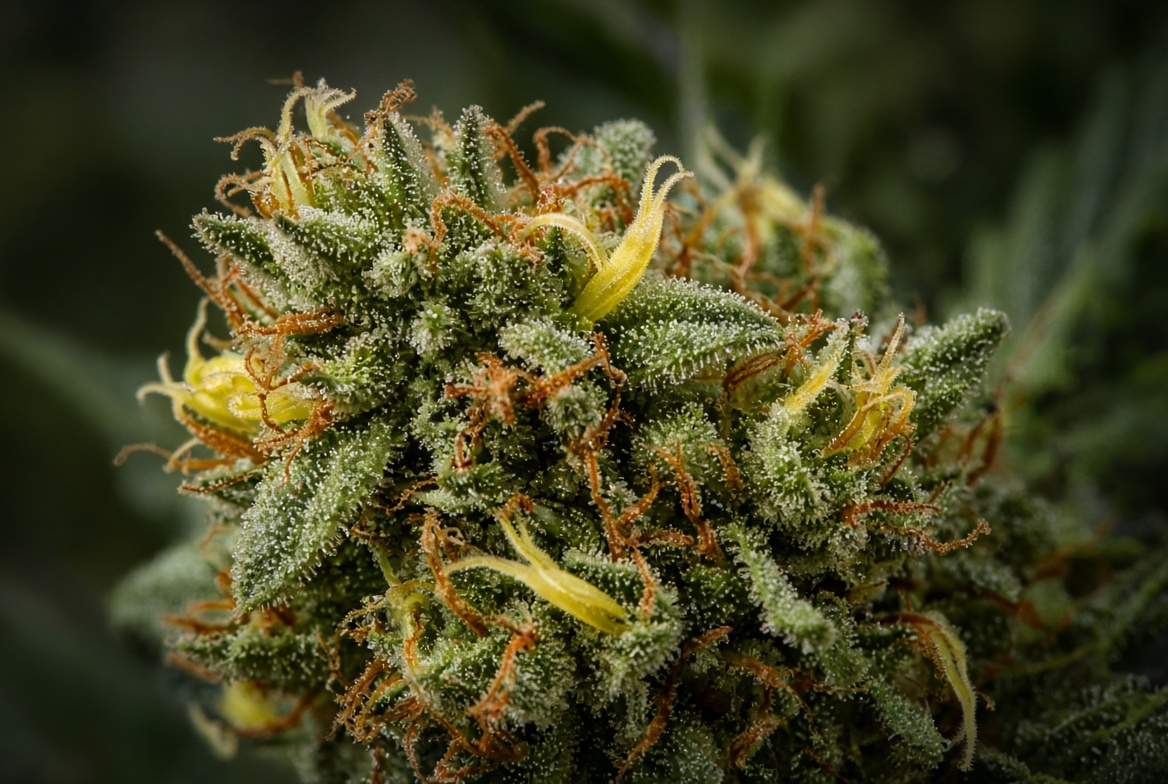
Wait until the female has been flowering for two to three weeks. By then the pistils are fully developed and receptive. Pollinating too early gives poor seed set. Pollinating very late leaves too little time for the seed to mature.
Reading pistil readiness
Receptive pistils are white, upright and slightly sticky. Once they begin browning and curling, receptivity is falling. Look at the specific branch you plan to use rather than the whole plant. A steady line such as Guavaz Feminized gives you a clear, even window.
Timing on the male side
Male sacs swell, turn pale and then split open. Collect just before they open rather than after. Once open, pollen falls continuously and control becomes impossible. Check the plant twice a day at that stage.
Collecting pollen
Place clean paper under the branches in a still room. Turn the fans off first. Tap the branches gently and let the pollen drop. Then fold the paper and carry it out carefully.
Drying and storing pollen
Mix the pollen with a spoonful of plain flour to keep it dry. Seal it in a small container with a desiccant sachet. Kept frozen it stays viable for months. Label the container with the male number and the date.
Testing viability
Pollinate one small branch as a test before committing. Check for swelling bracts a week later. If nothing swells, the pollen was dead or the timing was wrong. That single test saves an entire cycle.
Method one: pollinating a whole plant
Move the female into a separate space and dust her thoroughly. Use a soft brush or simply shake the pollen over her. Leave her isolated for two days, then rinse and return her. This method gives the most seed and the least flexibility.
Method two: the bagged branch
Slide a paper bag over one branch and tie it at the stem. Introduce pollen into the bag, then shake gently. Leave the bag on for twenty four to forty eight hours. This is the method most home breeders should use.
Method three: the paintbrush
Load a small artist brush with pollen and paint individual pistils. This targets a handful of flowers precisely. It suits situations where you want very few seeds. It also works when you are crossing several males onto one plant.
Isolating the treated branch
Whichever method you use, keep the pollen contained. Label the branch immediately with the male number. Take a photograph so you can identify it at harvest. Untagged branches are the most common cause of confusion later.
Rinsing afterwards
Spray the treated area with plain water once the bag comes off. Water deactivates loose pollen on contact. Do this outside the flowering room if possible. Then wash your hands and change clothes.
Preventing stray pollen
Work with females first each day and pollen last. Keep a dedicated shirt for pollen work. Turn off extraction fans during collection and dusting. Small habits like these prevent most accidents.
How seeds develop
Bracts swell noticeably within seven to ten days. Seeds usually mature in four to six weeks from pollination. Plan the flip so the plant has that time. A vigorous line like Royal Moby Feminized often carries seed well into late flower.
Knowing when seed is ripe
Ripe seed is dark, hard and often patterned. Pale, soft or greenish seed is immature and will not germinate. Bracts split open when seed is ready. Harvest that branch even if the rest of the plant continues.
Cleaning and drying seed
Break the dried bracts open by hand and separate the seed. Discard anything pale or crushed. Dry the seed on paper for a week at room temperature. Only then move it into storage.
The complete sequence
- Flower the female for two to three weeks.
- Collect pollen just before the sacs open.
- Bag one branch and introduce the pollen.
- Remove the bag after two days and rinse.
- Let seed mature for four to six weeks.
- Dry, clean, label and store cold.
Autoflowers and timing
Autoflowers compress everything, so the window is tighter. Pollinate around week three of flowering at the latest. Otherwise the plant finishes before the seed matures. Quick lines such as Rainbow Jelly Autoflower demand that discipline.
How many seeds one branch produces
A single well pollinated branch typically yields fifty to two hundred seeds. That is far more than most home breeders need. Therefore one branch per cross is usually plenty. Reserve the rest of the plant for a normal harvest.
Storing finished seed
Put dried seed in a sealed jar with a desiccant sachet. Keep that jar in a refrigerator rather than a cupboard. Stored this way, viability holds for years. Write the cross, the date and the parent numbers on the label.
Keeping a crossing log
Record the female, the male, the date and the method used for every cross. Add a note on how well the seed set. After several crosses that log becomes genuinely valuable. It also lets you repeat a success rather than guess at it.
A note on local law
Cannabis cultivation rules differ widely between countries and often between regions. Seeds are sold as collector and genetic preservation items. This article is general horticultural information. Please check what applies where you live before growing anything.
Label the pollinated branch
Tie coloured tape around the treated branch and write the date on it. Six weeks later, with the plant full, nobody remembers which branch received pollen. Therefore the tape prevents harvesting the wrong flower and mixing seeded material with clean flower. Consequently separation at the end becomes simple and quick.
How many branches to treat
Two or three branches on the same plant already yield more seed than most growers need. By contrast, treating half the plant costs a large share of the flower harvest. Therefore start small on a first attempt. In fact almost every beginner pollinates more than they needed to.
Airflow on application day
Switch the fan off before opening the bag and back on only once everything is closed. Moving air carries pollen across the whole room in seconds. Therefore that one minute of patience protects the entire flower harvest.
Knowing when the seed is ready
Count four to six weeks from application. A finished seed is hard, dark and often striped, and the calyx tends to split open on its own. By contrast, a pale soft seed is not ready and will not germinate. Therefore check the treated branch every few days towards the end rather than cutting the whole plant on a fixed date.
Frequently asked questions
When is controlled pollination best done?
Two to three weeks into flowering, while the pistils are white and upright.
How much pollen do I need?
Very little. A pinch coats an entire branch and produces dozens of seeds.
Will one pollinated branch seed the whole plant?
Not if it is bagged and rinsed properly. Loose pollen, however, spreads easily.
How long until the seeds are ready?
Four to six weeks from pollination, depending on the variety and conditions.
